Installation Tips - Accurail USRA 55-ton Hopper
The Accurail USRA hopper is arguably the most accurate model available for this prototype model. Sure, it has molded on grabs and lousy wheelsets, but those are things we can deal with. Like most Accurail kits, this one is good model with the potential to be a great model.
| Here's the whole kit. Actually this kit was an early one. Notice the dummy couplers supplied with it. We won't be using those. | 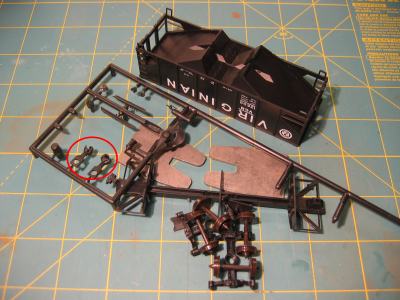 |
|
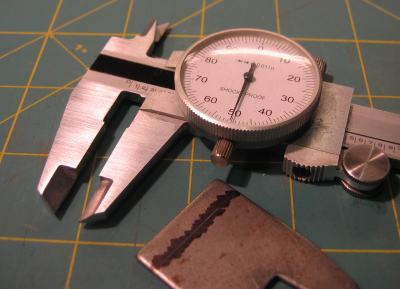
Steel weights on hopper cars are a royal pain when attempting to use the Prototype Couplers uncoupling wand. The wand tries it's best to attach itself to the weight. If the wand, can't come to the weight, the entire freight car will come to the wand. Once the two are attached, you won't easily separate them without taking the car off the rails. There is nothing critical about cutting back weights for box cars. It doesn't matter how ugly it is when your done because the weight is hidden. For hoppers though, the weight is at least partially visible, so we have to do a nice job. Use the dial calipers to scribe a line 1/4" from the top of the weight. Start by setting the calipers to 0.250" and use the thumbscrew to lock them there. Then draw the jaws of the calipers across the weight to create a scratch mark. I use a permanent marker to color the general area where I'm going to scribe a line. Then the line will be more visible. |
 |
|
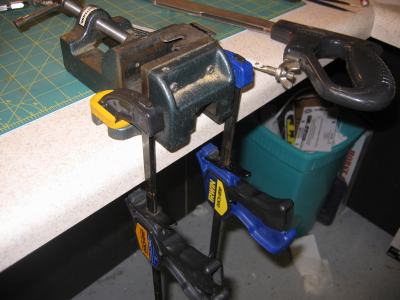
Here's the setup I use to cut the weight. A vise permanently mounted would probably be more convenient, but this works fine. I wouldn't try this with one of those nice rotating head Pansivise types. The heavy duty drill press vise works great though. Position the hacksaw blade so it cuts right up to the line so the weight is almost exactly 1/4" shorter than it was originally. |
 |
|
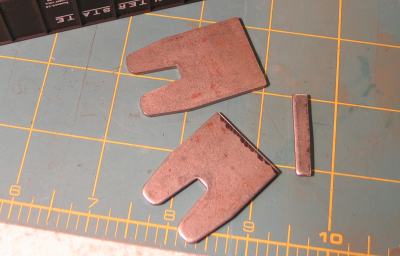
Here is a comparison of cut weight and an uncut one. Use a file to clean up any sharp edges. |
 |
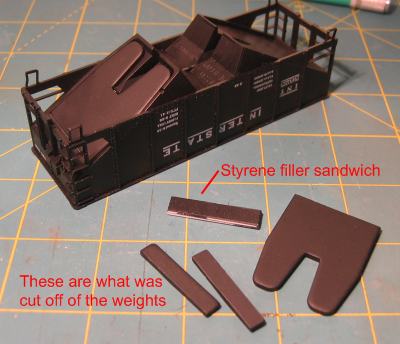
| Since the weights are now shorter, we'll need something to fill in the space on the underside of the slope sheets on the hopper. The weights are 0.080" thick. I had some 0.040" thick styrene, so I cut two 1/4" wide pieces to sandwich together for each end. I made the sandwiches by cementing two pieces together and then cleaning up the edges with a file. | 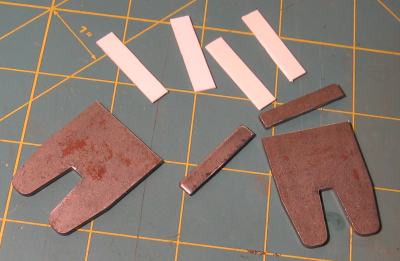 |
|
The weights and the styrene fillers need to all be painted to match the hopper as well as the part of the weights that was cut off. Test fit the weights along with the fillers. Use a file if needed to reduce the width of the filler strips. |
 |
| When you are happy with the way the weights and filler strips fit into the car, use a small (see photo) amount of Gorilla Glue to attach them. Remember to dampen the parts slightly with a wet paper towel before putting them in place. Let the car sit overnight to allow the glue to completely cure. | 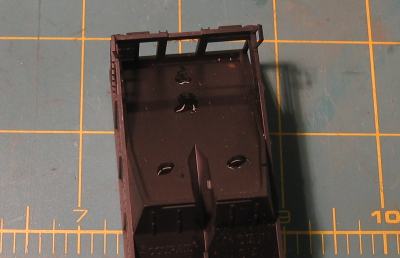 |
| If you are worried that the car is lighter than it use to be, you can glue the pieces of the weights that were cut off back where they aren't visible. | 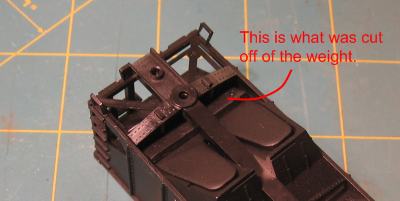 |
| Coupler installation is the easy part. Be sure to trim the burr from the lid before attempting to install the lid. | 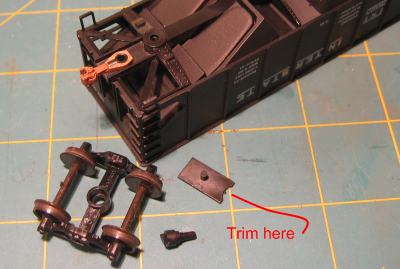 |
| The coupler box is a little shallow for Sergent coupler. There is no reason to thin the shank though. Press the lid on with just enough room for the coupler to swing side to side without binding. Then use two small dots of gap filling superglue on each side of the box as insurance that the lid won't fall off later. Superglue is used instead of plastic cement because in doesn't hold to the plastic particularly well. This will be a good thing if the coupler needs to be replaced at a later date. The lid can easily be pried off by inserting a hobby knife or screwdriver blade under the lid and twisting. | 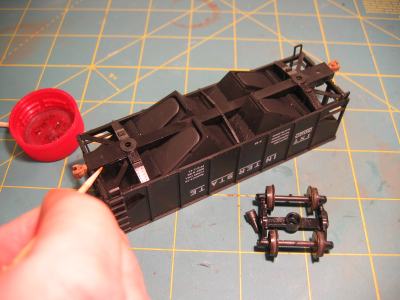 |
| The finished product! | 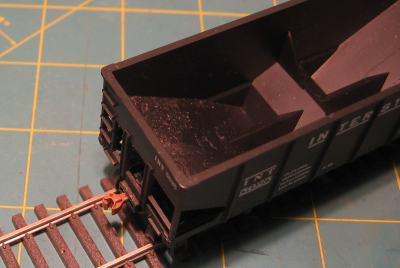 |