Installation Tips - Athearn 40' Gondola (new model with diecast floor)
I bought this model specifically to figure out how to mount Sergent couplers on new Athearn cars. As one very familiar with the old blue box models I was very surprised to see how new Athearn cars go together. The diecast frame was a surprise. The lack of detail in the interior of the gon was a surprise too. Maybe this is an old Roundhouse/MDC design. Maybe its a new design. I don't know it's heritage, but it's certainly unfamiliar.
| Here's where we start. There's nothing terribly unusual here. | 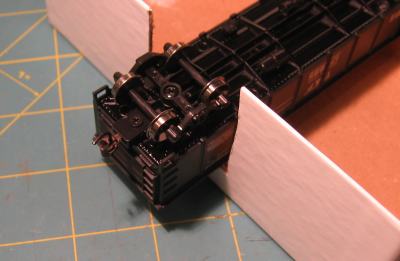 |
|
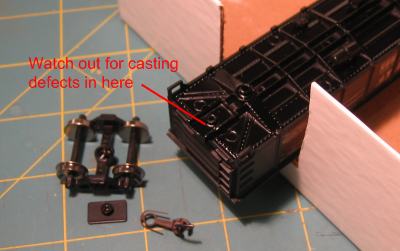
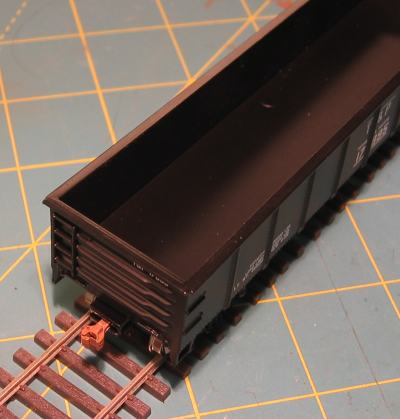
Here it is with the truck and coupler lid removed. The coupler box surface isn't flat, but has what looks like a glob of paint on the side of the coupler post. When I tried to scrape it off, I realized it wasn't paint at all, but is a casting defect. The other end of the model didn't have the same problem. A quick test fit showed that the coupler box was way too shallow for the Sergent couple shank. |
 |
|
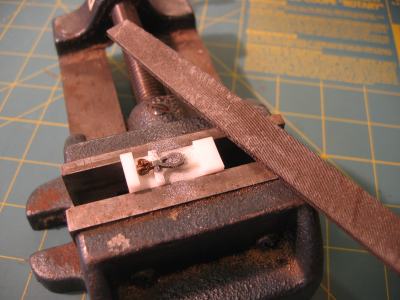
The shank on the compatible shank couplers can be thinned in such instances as this. Mount a Sergent Engineering AFC assembly fixture in a vise as shown. The vise I use is an old drill press vise from Sears. It's great for all sorts of tasks. Quality of files vary greatly. I bought this 6" file from Sears as well years ago, and it's outlasted many imports that I tried. Put the coupler on assembly fixture and remove metal from the bottom of the shank with a file. Test fit the coupler and repeat the operation until the coupler swings freely in the box with the lid installed. |
 |
|
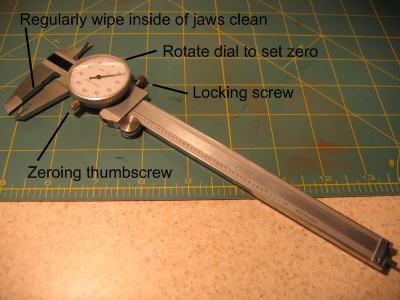
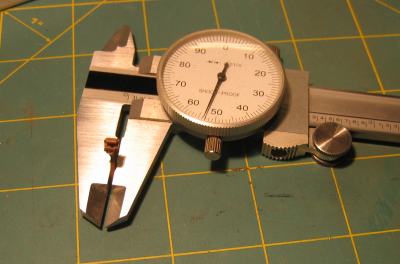
I highly recommend a set of dial calipers for this conversion and in general. These are infinitely more useful than a ruler. You'll find a gizzilion uses for this tool once its on your workbench. I have seen special versions of these calibrated in HO scale but frankly, I wouldn't mess with those. First, they cost more. Second, you'll find you need to measure in real inches more often than you do in scale inches. (What's the diameter of a 2-56 screw in HO inches????) Cheap calipers from harbor freight are more than adequate for our purposes. In fact, they are so cheap that you might want to order two in case you drop one and destroy it. I like the analog version rather than the digital version because the analog version is zeroed with a thumb screw. The digital version looses its zero every time it powers down. When the calipers are closed completely, they should read zero. If not, open them up a little and wipe the dust off the jaws with your finger, then try again. If they still don't read zero, loosen the thumb screw and rotate the dial so the zero is lined up with the needle. Now tighten the thumb screw back. Open and close the calipers a couple of time to verify that they return to zero. Now the calipers are ready to use. A cheap calculator is needed as well when conversions to and from scale dimensions are necessary. Multiply real inches by 87.1 to get scale inches. Divide scale inches by 87.1 to get real inches. If you can't remember when to multiply or divide, pick one and if you get a silly answer, pick the other one. |
 |
|
Once you find the right shank thickness, measure it and thin the coupler for the other end of the car to match. It's a lot easier to measure the thickness of the coupler as you remove metal than it is to repeatedly install it and tighten the lid to see if its right yet. This application requires a shank that's about 0.053" thick. As supplied from Sergent Engineering, the shanks are 0.062" thick. FYI, a prototypically thick shank would be 0.072" thick, but then it would be too thick to fit any of our models. Shanks on "traditional" HO scale knuckle couplers are only 0.050" thick. |
 |
|
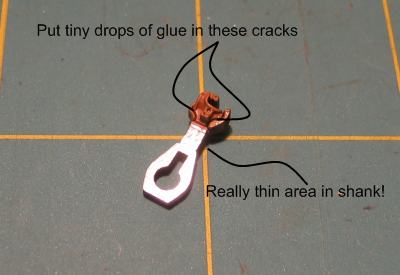
Thinning the shank a little doesn't affect the performance of the coupler. However, I consider anything less than 0.055" to be thinning the shank a lot - not a little. The real danger is that the bottom cover of the coupler will bend and let go of the knuckle. To prevent that, add a couple of tiny drops of super glue to the head of the coupler in the areas indicated on the picture. The glue will be sucked into the gaps in the bottom of the coupler and make the coupler head solid. |
 |
|
Once the shanks on the couplers are thinned. The model can be reassembled quickly. Here is the final product. |
 |