Installation Tips - Roundhouse 36' Old Time Box / Reefer Car (with WARPED floor)
This was supposed to be a super easy conversion. I had already swapped couplers on two similar models with no problems. For some reason the couplers were VERY tight in the boxes when the lid was tightened down on this model. Eventually, I found out why.
In the mean time, this model will allow demonstration of how to deal with tight coupler boxes in general. Tight boxes are not uncommon. In many cases (not this one), they are actually designed that way.
| Here's where we start. There's nothing terribly unusual here until I tried to slip the coupler over the mounting post. The post is too big and I have to force the coupler over it. Not good. | 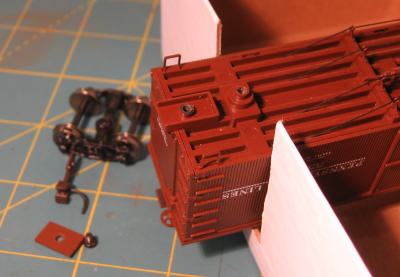 |
|
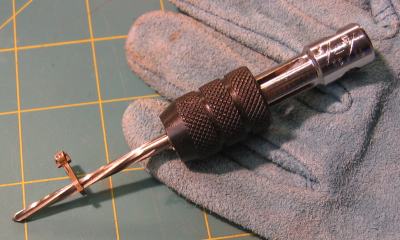
It's not hard to enlarge the mounting hole on the compatible shank couplers, but you have to have the right tool. Don't even try to do it with a drill bit. A few twist with our RM20 Tapered Reamer will make short work of it. Cut a little metal away, then test fit, and repeat until the coupler slips over the post easily. Don't try to cut too much metal away at a time or the reamer will bite. If it does bite, back off and try again. SAFETY NOTE: The RM20 reamer is ultra sharp! Use leather gloves like those shown when using it or you'll slice your finger. Ask me how I know. |
 |
|
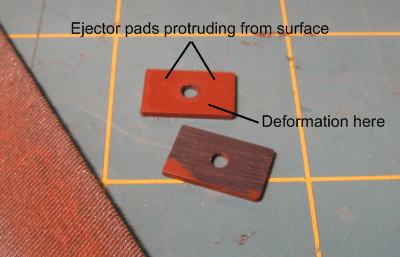
Once the coupler would swivel freely on the post, I replaced the lid to see if the I had fixed the tight box problem. No luck. When the lid is tightened, the coupler is locked in place. I examined the lid to see if something odd was going on there. Sure enough, the lid wasn't flat. It had ejector pads that extended beyond the surface of the lid and the area around the screw hole was deformed slightly. I raked the lid across a file to flatten the surface of the lid. The picture shows a before and after of the lid. |
 |
|
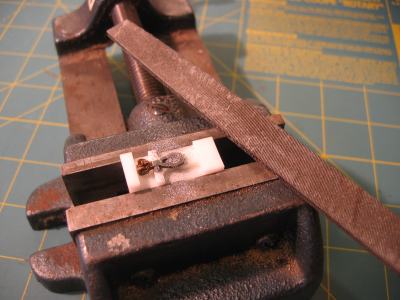
I replaced the lid to make sure the problem was fixed. No luck. When the lid is tightened, the coupler is locked in place. Now it's time to get serious. The shank on the compatible shank couplers can be thinned in such instances as this. Mount a Sergent Engineering AFC assembly fixture in a vise as shown. The vise I use is an old drill press vise from Sears. It's great for all sorts of tasks. Put the coupler on assembly fixture and remove metal from the bottom of the shank with a file. Test fit the coupler and repeat the operation until the coupler swings freely in the box with the lid installed. |
 |
|
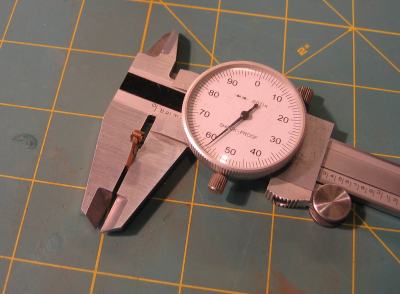
Success at last! Once you find the right shank thickness, measure it and thin the coupler for the other end of the car to match. It's a lot easier to measure the thickness of the coupler as you remove metal than it is to repeatedly install it and tighten the lid to see if its right yet. This application requires a shank that's about 0.058" thick. As supplied from Sergent Engineering, the shanks are 0.062" thick. FYI, a prototypically thick shank would be 0.072" thick, but then it would be too thick to fit any of our models. Shanks on "traditional" HO scale knuckle couplers are only 0.050" thick. |
 |
|
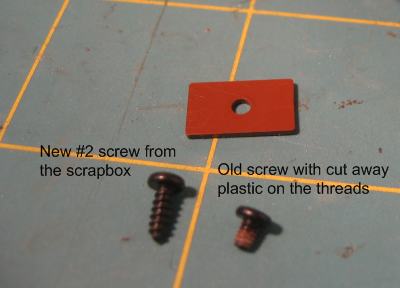
You might expect that this is the end of this story - but its not. All of that test fitting while checking to see if the shank was thin enough yet took its toll on the hole that the coupler screw goes into. Eventually the threads were stripped such that the lid could no longer be tightened in place. The picture shows the factory screw with plastic on its threads that got cut away from the hole. The fine threads on this screw were never designed to go into plastic. These machine screws are designed to go into threaded holes in metal. The screw on the left is a #2 screw from my scrap box. It's deep threads are perfect for use in plastic. We'll swap out the old screw with the new one to make sure the lid doesn't fall off while the car is in operation. |
 |
|
Before attempting to use the new screw, check that its length won't cause it to bottom out and break something. In this case, its not a problem because the hole goes all the way through the floor of the car. Use a #49 drill to make sure the diameter of the hole is big enough for the screw. This is more of a clean up exercise than a drilling exercise. You can spin the drill buy hand. The hole might actually be larger than the drill since its threads have been striped. |
 |
|
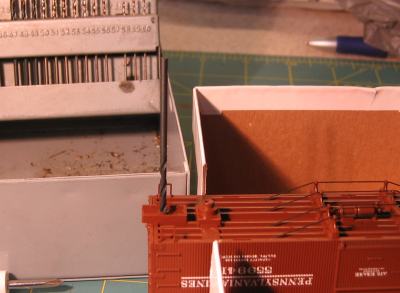
Finally, the thing goes back together. |
 |
|
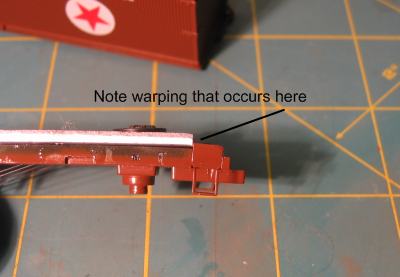
Here's why this car was such a problem. Of course, I didn't realize this when I started. The weight was too long and was jammed in place anyway. This caused the floor to warp downward and actually curved the surface of the coupler box. The result is that the coupler was held tight when the lid was screwed on. I actually removed the weight and tried to straighten the floor, but was unsuccessful. |
 |