Airbrush Painting Tips
This page provides instructions for painting castings that come with the couplers supplied as kits when you want to use an airbrush rather than a rattle can. You can get a thinner coat of paint on the couplers when you use an airbrush rather than the spray can. You can also adjust the color of the paint to be more to your particular liking.
|
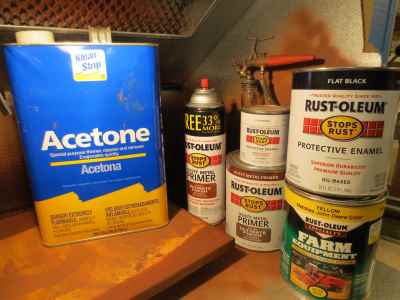
I'm a big fan of Rustoleum paint for metal parts. It is super durable. It protects the parts from corrosion and its really cheap compared to the 1 ounce bottles paint available at hobby retailers. It's available in spray cans and pints and quarts. You can find it just about anywhere (including Walmart). A mix that uses the Rustoleum Metal Primer as a base can represent bare rusted metal (like couplers) better than anything I have found. I add a little Sunburst Yellow or Flat White when I want a lighter color. More typically, I add Flat Black to tone down the "redness" of the Rusty Metal Primer. I thin the Rusoleum mix with lots of acetone which is also handy for dissambling troublesome complers. Rustoleum used to recommend Mineral Spirits for thinning their paint, but has changed that guidance over the last few years to acetone instead - which is handy for me. |
 |
|
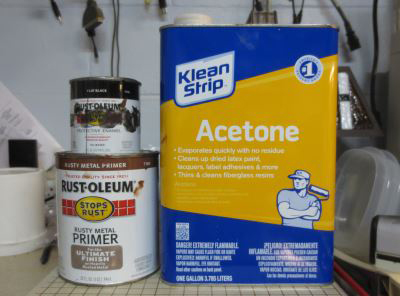
The paint is widely available in the United States at Walmart, Home Depot, Lowes, Ace Hardware, etc. Here are some links to the manuafacturer information pages so you can make sure you get the right thing. Rusty Metal Primer Other Colors I recommend getting a quart of Rusty Metal Primer and a half pint of Flat Black to start with. Acetone is typically available in quart and gallon containers. The gallon container shown here is impossible to pour without spilling. I'd go for the quart container if you have the option. Before you purchase the paint, find a nice clerk and get them to put the paint on their shaker machine for a bit so you don't have to work so hard to do the same thing at home. You'll notice that the cans in the picture are pretty messy. Take that as a warning. Mixing the paint is going to be a very messy job. |
 |
|
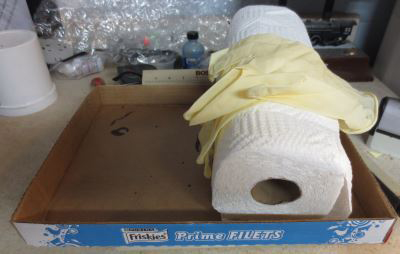
Prepare to get messy. Gather some paper towels and find a cardboard or other disposable work surface. Rubber gloves will also help. In theory, any spilled paint/thinner will drip safely on the cardboard and the gloves will keep the paint off of your hands. In practice, this is going to be a mess. The paint and acetone will manage to drip or pour off of the cardboard surface and onto your floor or clothes. The gloves will start to disolve when they are hit will full strength acetone and will turn into goo. It's best to do this job outside in a driveway if possible. The fumes from the acetone will result in fewer complaints outside as well. |
 |
|
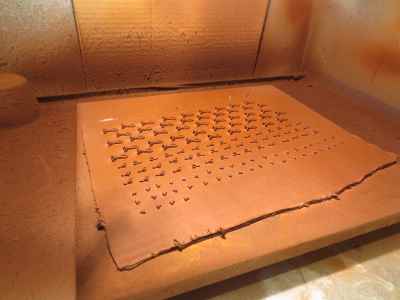
Start by spreading out the castings on a piece of cardboard. Turn all the parts so the outer side is up as shown in the picture. This is the slow part of the process. Don't worry about the other side - paint can cause problems there. |
 |
|
Hit the batch of couplers with a few light passes. Then turn 90 degrees and repeat. Repeat 4 times and you're done. Work goes quickly. Move the cardboard somewhere where it won't be disturbed for a couple of days to let the paint cure fully. The actual painting can be done in a paint booth or outdoors works just as well. |
 |
|
If you want to get fancy you can mix paint to vary colors slightly and use an airbrush. Rustoleum recommends paint be thinned with acetone available from hardware stores. (Acetone is also handy for disassembling couplers if the need arises.) |
|
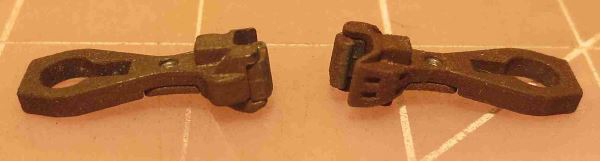
As applied, the Rustoleum paint has a rough surface. Once the couplers are assembled, pencil lead is applied for lubrication, and the couplers have gone through the break-in procedure, use a stiff paintbrush to polish the painted surfaces. This will smooth the rough finish, lighten it slightly, and blend the pencil lead. The picture gives a before and after comparision. The coupler on the left has been "polished". The one on the right still has its original rough finish. The picture really doesn't do justice to the difference that this operation makes. Try it. You'll be impressed. |
|