Assembly Instructions - S Scale/O Scale EC64K, EC64JK, EC48K
This webpage serves as assembly instructions for Sergent Engineering/Prototype Couplers EC64 S scale coupler kits, and temporary instructions for the Prototype Couplers EC48 O scale coupler kits. No printed instructions are provided with the kits. Assembly is pretty simple really as you will see.
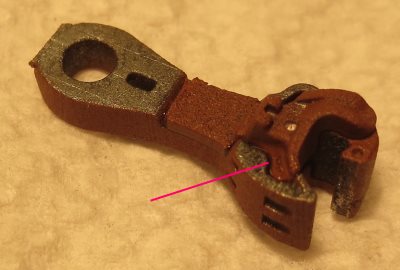
These couplers come in two versions. The J version has a flat machined on the back of the shank. This flat allows the coupler centering mechanism developed by John Degnan to work when used with his draft gear boxes.
| Shown here are the contents of the kit - enough castings to build four couplers plus a BP64 ball/spring pack that contains five each locking balls and friction springs. | 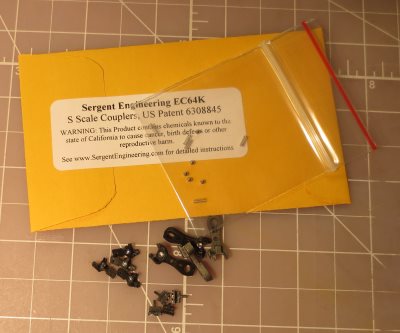 |
|
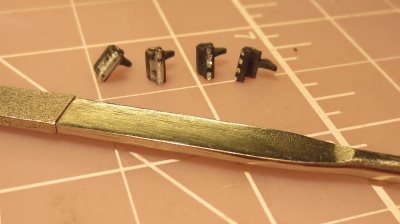
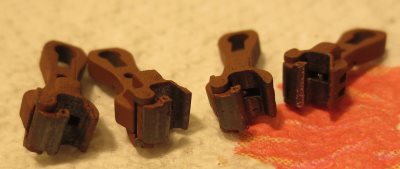
Prior to painting or assembly, the knuckle castings will have to be cleaned up a bit. As supplied, the knuckle castings will have some rough spots on the face where they have been broken off of their sprue. The two knuckles on the left in the picture have been cleaned up. The two on the right have not. This is probably a lot easier than it sounds, but you need the right tool for the job. The right tool is a flat diamond file. A full set of small diamond files will cost you about ten bucks by the time you pay shipping charges and they are useful for many other modeling tasks as well. Here's a link to one source. Just file rough spots down so the surface of the knuckle is smooth. |
 |
|
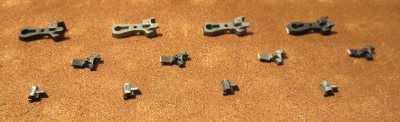
After cleaning up the knuckles, castings should be painted prior to assembly. Click here to see how to paint lots of coupler castings at once. This picture shows the castings all set out on a piece of cardboard that has been used for the purpose many times before. |
 |
|
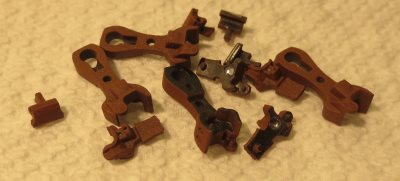
Let the paint cure for a day or two so it gets hard, then assembly can continue. Notice that only the top side of the coupler casting is painted. Painting the side of the castings where the ball lives is just asking for trouble. |
 |
|
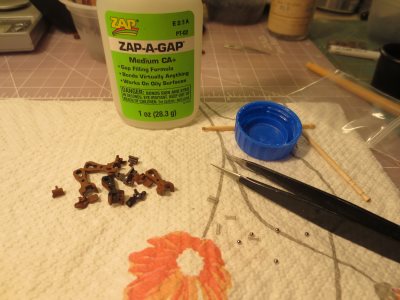
Here you see basically everything needed for assembly. I always use a paper towel as a work surface so I can dump the ball pack contents out without the balls rolling away. My favorite brand of gap filling CA is Zap-A-Gap which is available from MicroMark. The bottle cap holds a few drops of CA so I can dispense it with a toothpick. Finally, the non-magnetic tweezers are used to load the balls into the couplers. |
 |
|
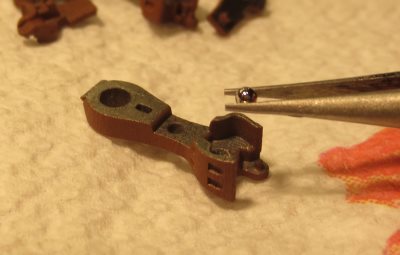
Start with a top casting upside-down and use the tweezers to drop a ball in. Don't touch the the ball with your bare hands else you might get skin oils on it that might keep it from moving freely. |
 |
|
Load the knuckle next. The "fluffy" paper towel work surface helps to keep the knuckle from falling out. |
 |
|
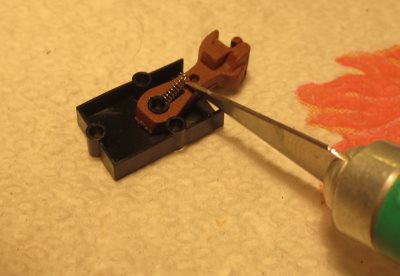
Next, use a toothpick to transfer a drop of CA into the corner shown in the photo. |
 |
|
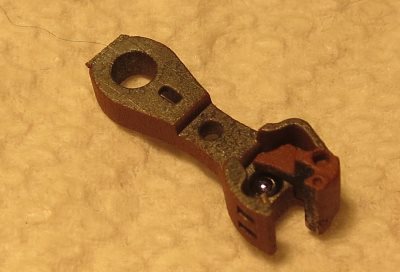
Now put the bottom cover in place. This is sort of a two handed operation. One hand keeps the knuckle from falling out and the other hand puts the bottom cover in place. Add another drop of CA in the location shown in the photo. Capilary action will draw the glue into the gap between the top casting and the bottom cover creating a very strong assembly. |
 |
|
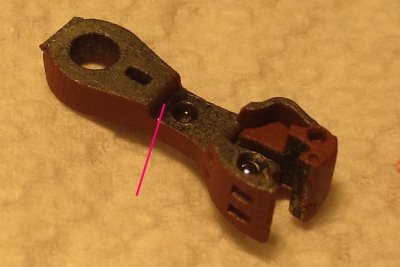
Resists the temptation to play with the couplers just yet. Leave the couplers UPSIDE-DOWN and undisturbed for at least a few hours. If a coupler is turned right-side-up before the glue cures fully, there is a chance that the ball will fall into some glue and the coupler will be locked forever. The "forever" part isn't entirely true. Couplers that are assembled with CA can always be taken apart after soaking them in acetone for about five minutes. Leave the coupler in overnight and all traces of the glue will be gone. Do expect to have to repaint the coupler in this case though. See details here. |
 |
|
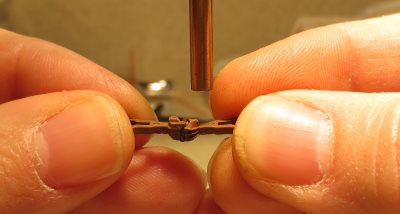
Break-in is essential if the couplers are to operate reliably. Pencil lead (graphite) makes a great lubricant. The first step is to color the mating surfaces thoroughly with a pencil. Be sure the knuckle is covered on both the inside and outside surfaces. |
 |
Once the graphite is applied, the couplers should be operated by hand while upside-down to allow the graphite to find its way into all the inner workings. This will break loose any flash on the mechanism. |
|
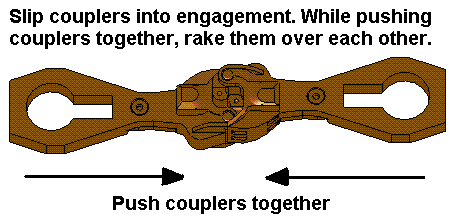
Next, rake the couplers over each other vertically to polish the surfaces and smooth away any potential operational problems. Turn the couplers right side up and let them lock together. Push them together while you slide them across each other vertically to polish the coupler head socket and front of the knuckles. A little bit of a catch is ok as the knuckle parting lines cross. Now pull them apart with while performing the same action. This will polish inner side of the knuckle. |
|
|
After the break-in procedure its a good idea to test the couplers by hanging an uncoupling wand off a desk lamp. Couple. Uncouple. Repeat. Go through this a few times until you are confident in the reliability of the couplers. |
 |
|
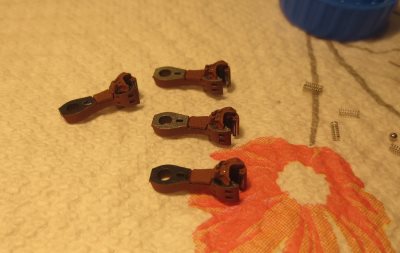
Here are the four couplers assembled and ready to install. |
 |
|
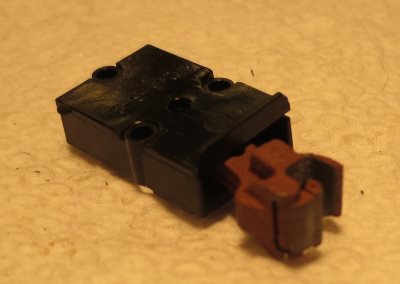
The EC64 couplers have a 3/32" mounting hole and fit just fine in a Kadee 802 style box (not included) that you probably already have on hand. The friction spring fits in the slot in front of the mouting hole. If you try to use the couplers without a friction spring, you'll soon find out what its purpose is. The friction spring holds the couplers in alignment while you are preparing to couple. To install the friction spring, I pick up the spring with a hobby knife and place it as shown in the picture. Next, put your finger over the back of the spring to keep it from flying away while you use the hobby knife to compress and insert the spring. Both the EC64 and EC64J couplers can be used in this manner with the friction spring which holds the couplers in alignment. The EC64J couplers can also be used in a draft gear box designed by John Degnan that provides automatic centering of the coupler if you'd rather. |
 |
|
Here's the spring in place. |
 |
|
Here's the coupler in the box ready to install. |
 |